Page loading...
Shopping Cart
- About Us
- Events
- Products
- Videos

Needle Felting
Have you ever tried needle felting? It is a very easy process to learn. We have taught most people in a couple of minutes.
How It Works
Needle felting uses barbed needles to pull fibers from a top layer of felt through a second layer permanently bonding the two fabrics together into one. The process of doing this is called needle felting. You need two basic tools to do the process: a needle felting punch which has 3 or 5 needles, and a needle felting mat or brush which you push into. Our simple rule of thumb on fabrics is that the applique must have a minimum of 20% wool to properly felt and the fabric it is felting to should be either of the same or higher wool content (if felt) or can be most any soft yarn (if knitted). However, always do a test on scrap material first to determine suitability.
The way we teach needle felting is to start with a wool felt penny or other shape and either a larger piece of wool felt of another color or another fabric like a sweater (wool, acrylic, etc.). Lay the applique on top of the second layer and place both on the mat or brush. Take the needle felting punch and start punching from the top applique to the second layer. Always start in the middle of the applique. It takes about a minute with the 5 needle tool to do a 2″ penny. Periodically remove the fabric from the mat and replace it. This helps the fibers which are being pulled to stay close to the fabric bottom surface and join better. The back of the piece will begin to look like the surface of a cashmere sweater with the color of the applique coming through.
At this point you could stop and steam iron the piece and call it quits or you could take the 3 needle tool, convert it to a liner, and go over all of the edges. This smooths and blends the edges of the applique so they almost melt or blend into the second layer. To convert our 3 needle tool, simply unscrew the tool and remove a needle. If you see some of the color coming through on the top surface from the underlying material, simply felt another applique, same as the first, on top of the one you just did. I've gone up to 8 layers thick which makes the color more vivid and adds real depth.
The final step is to steam iron the piece which causes the wool fibers to fully interlock. Did you know that when wool hair is grown, it is like a series of barbed caps stacked or joined one on top of the other. Sort of like stacking funnels but where the rim of the funnel has barbs that point inward. Adding steam causes these barbs to open outward and any other fibers or hairs around get intertwined so when they cool off and close the fabrics are permanently locked together.
Our wool felt kits can be assembled by either stitching or by a combination of needle felting and stitching. Try felting an applique and then adding a decorative stitch around the edge. Use your imagination to create some very unique effects.
These are very high quality tools which are made by Clover Mfg. in Japan.
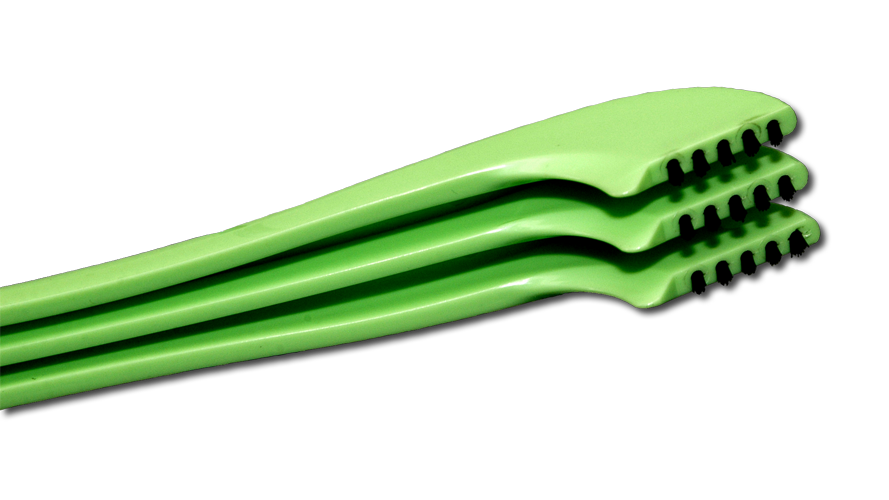
Needle Felting Tool (5 Point) - Clover Art 8900
This tool has 5 barbed needles that pull fibers from a top layer of felt through a second layer permanently bonding the two fabrics together into one. This tool quickly does the larger areas of an applique. This tool has a safety lock for when it is not being used as the needles are very sharp. It has fine needles which are best for our felts.
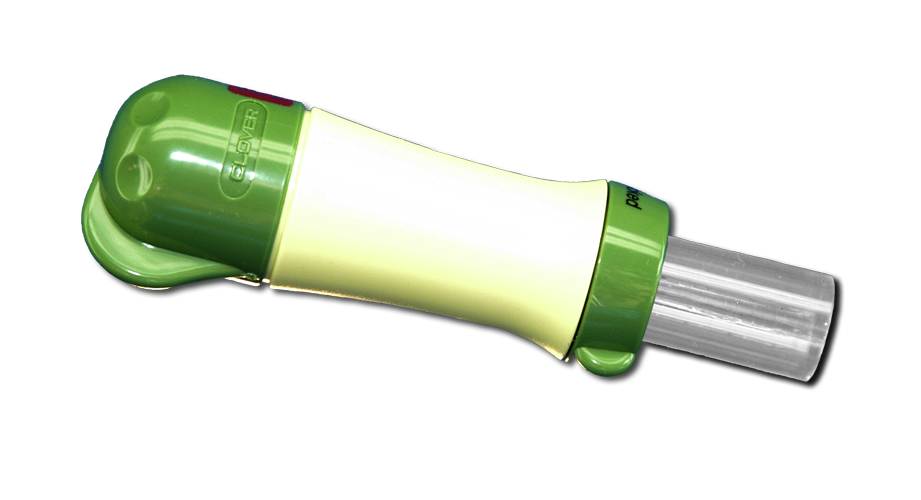

203.0156Needle Felting Tool (5 Point)1/$16.29
Needle Felting Tool (3 Point) - Clover Art 8901
This tools has 3 barbed needles. It is used in the same manner as the 5 Point tool. However, we prefer to convert it into a liner to do the detailed work. To convert the tool simply unscrew the body and remove a needle. Place the needle in a safe place as it is sharp and can easily be broken.
To use it as a liner or fine point tool, simply go over the edges of the applique and the felt will blend into the underlying fabric.
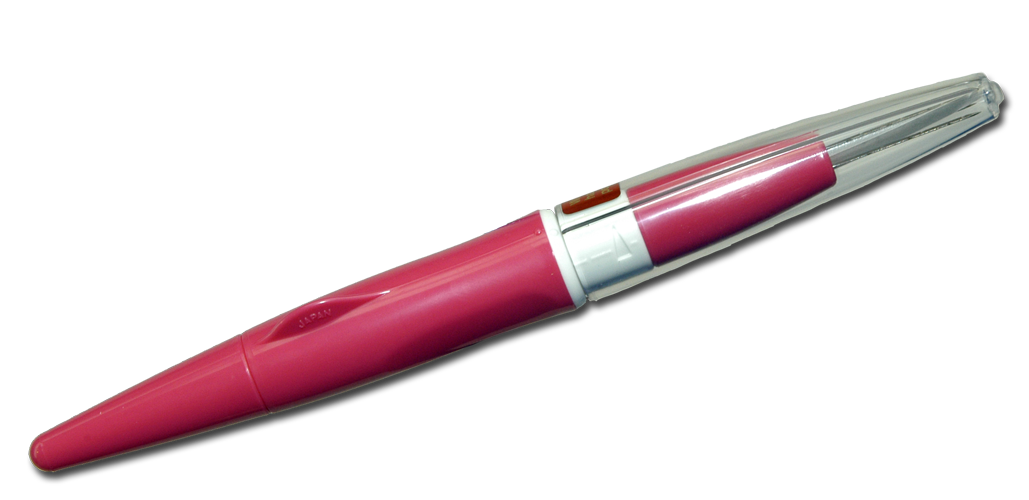
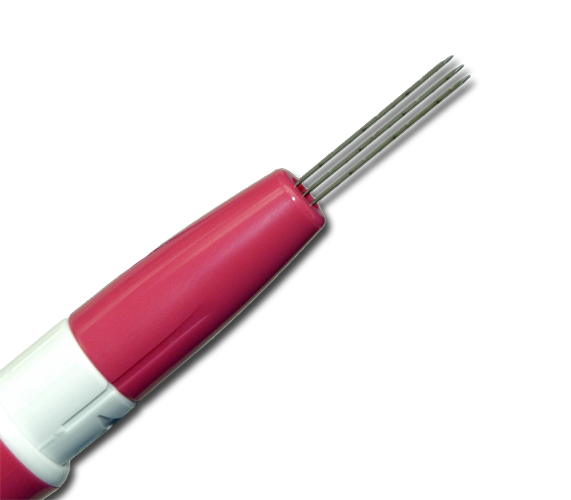
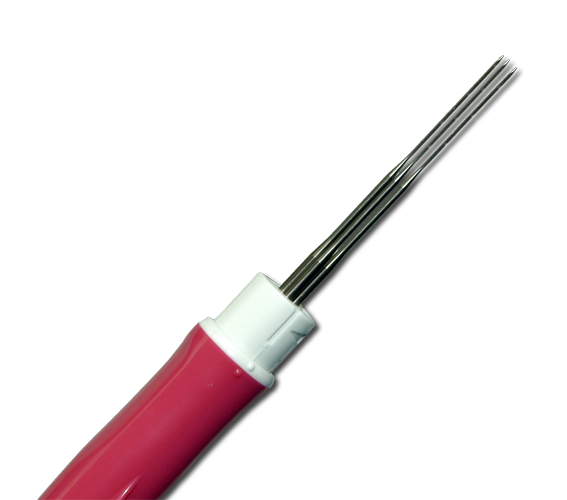
203.0157Needle Felting Tool (3 Point)1/$11.95
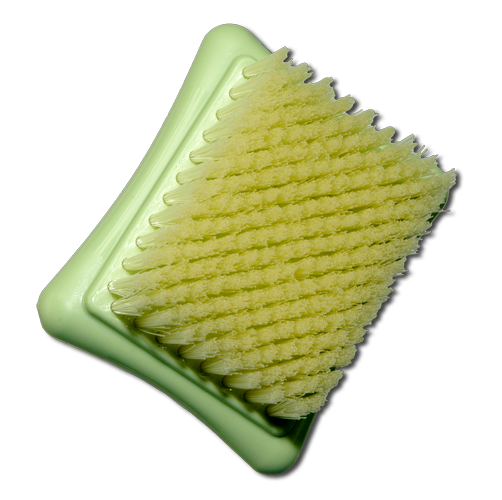
Needle Felting Mat or Brush - Large - Clover Art 8910
This mat or brush is used underneath the fabric to receive the sharp needle with the fibers. The large mat is approximately 31⁄2″ × 51⁄2″ and works on most articles except small openings like sleeves.
The mat can be used over and over again but eventually will fill up with the hairs and fibers of the materials that you are felting. To remove these use the Needle Felting Claw and Mat Cleaner. The cleaner works like a comb on a hair brush.

203.0158Needle Felting Mat - Large1/$16.95
Needle Felting Mat or Brush - Small - Clover Art 8911
This mat or brush is approximately 3″ × 31⁄2″ and works best by fitting into small openings like sleeves. It will help you applique items to sleeves of sweaters.
203.0159Needle Felting Mat - Small1/$9.95
Needle Felting Claw and Mat Cleaner - Clover Art 8919
This is a really unique tool. First, on one end is a rake which can hold down small parts while you use the 5 point tool to needle felt them into the base layer. On the other end is a cleaner which is designed to fit between the bristle rows of the mat reaching deeply ino the roots of the mat bristles to remove the hairs and fibers.
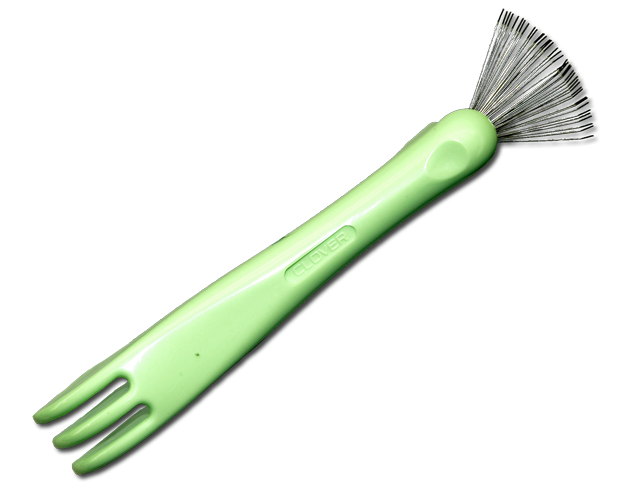
203.0160Needle Felting Claw1/$8.59
Replacement Fine Needle Felting Needles - Clover Art 8905
So, why do you need replacement needles. Needle Felting needles while very strong in the push/pull direction can be easily broken if bent. Since the needles have lots of sharp barbs on the sides it makes them easier to break than a normal sewing machine needle. The typical way that a needle gets broken is when someone drops the tool. Both of our felting tools can be disassembled to replace the needles.
These needles are of a size called fine. This is best for the type of felts we use.
203.0155Replacement Needles - Fine (5 Pcs)5/$6.79
back to Sewing Tools
© 2010-2019 The Lumenaris Group, Inc.
Lumenaris is a trademark of the Lumenaris Group, Inc. See notes for our terms and conditions, including our return and cancellation policies. If you'd like to learn more about how you can carry Lumenaris products, read about becoming a retailer.